9/21/2014 just installed the floor and joist in the last few weeks then the inch 1/8 th plywood. we left a couple of sheets off to help with the crawl space access. the stone mason installed some samples of mortar color and depth and will start shortly with the chimney decorative rock. we are now installing the 2x12 around the top of the rastra wall to give the truss work a place to attach. we have moved more dirt up to the house to make it easier to work on.
before the floor joist were installed we built two pony walls the length of the house to help support the concrete floor that will be poured later this winter with the radiant floor tubing in it. the pony walls have three crawl space openings in each so we can have access to all the underfloor areas. we attached simpson brackets to the floor ledger that was hung last year, we had to coordinate the bracket with the 3/4 inch anchor bolts that were imbedded into the rastra wall . all the vertical 2x6 pony wall supports had to line up with the floor joist for support. the floor joist came full width of the house to make installing them easier , just trim to length and slide down into the bracket . alot of wood blocking and nailing finished the job.
with the plywood down we marked out the walls on the interior of the house so plumping will be easier and after rough plumping will come the heat duct work. then we will attach the last sheet of plywood and use the crawl space opening .
pictures below
Sunday, September 21, 2014
Wednesday, September 3, 2014
Back Fill and Floor Trusses
September 3, 2014 Wednesday
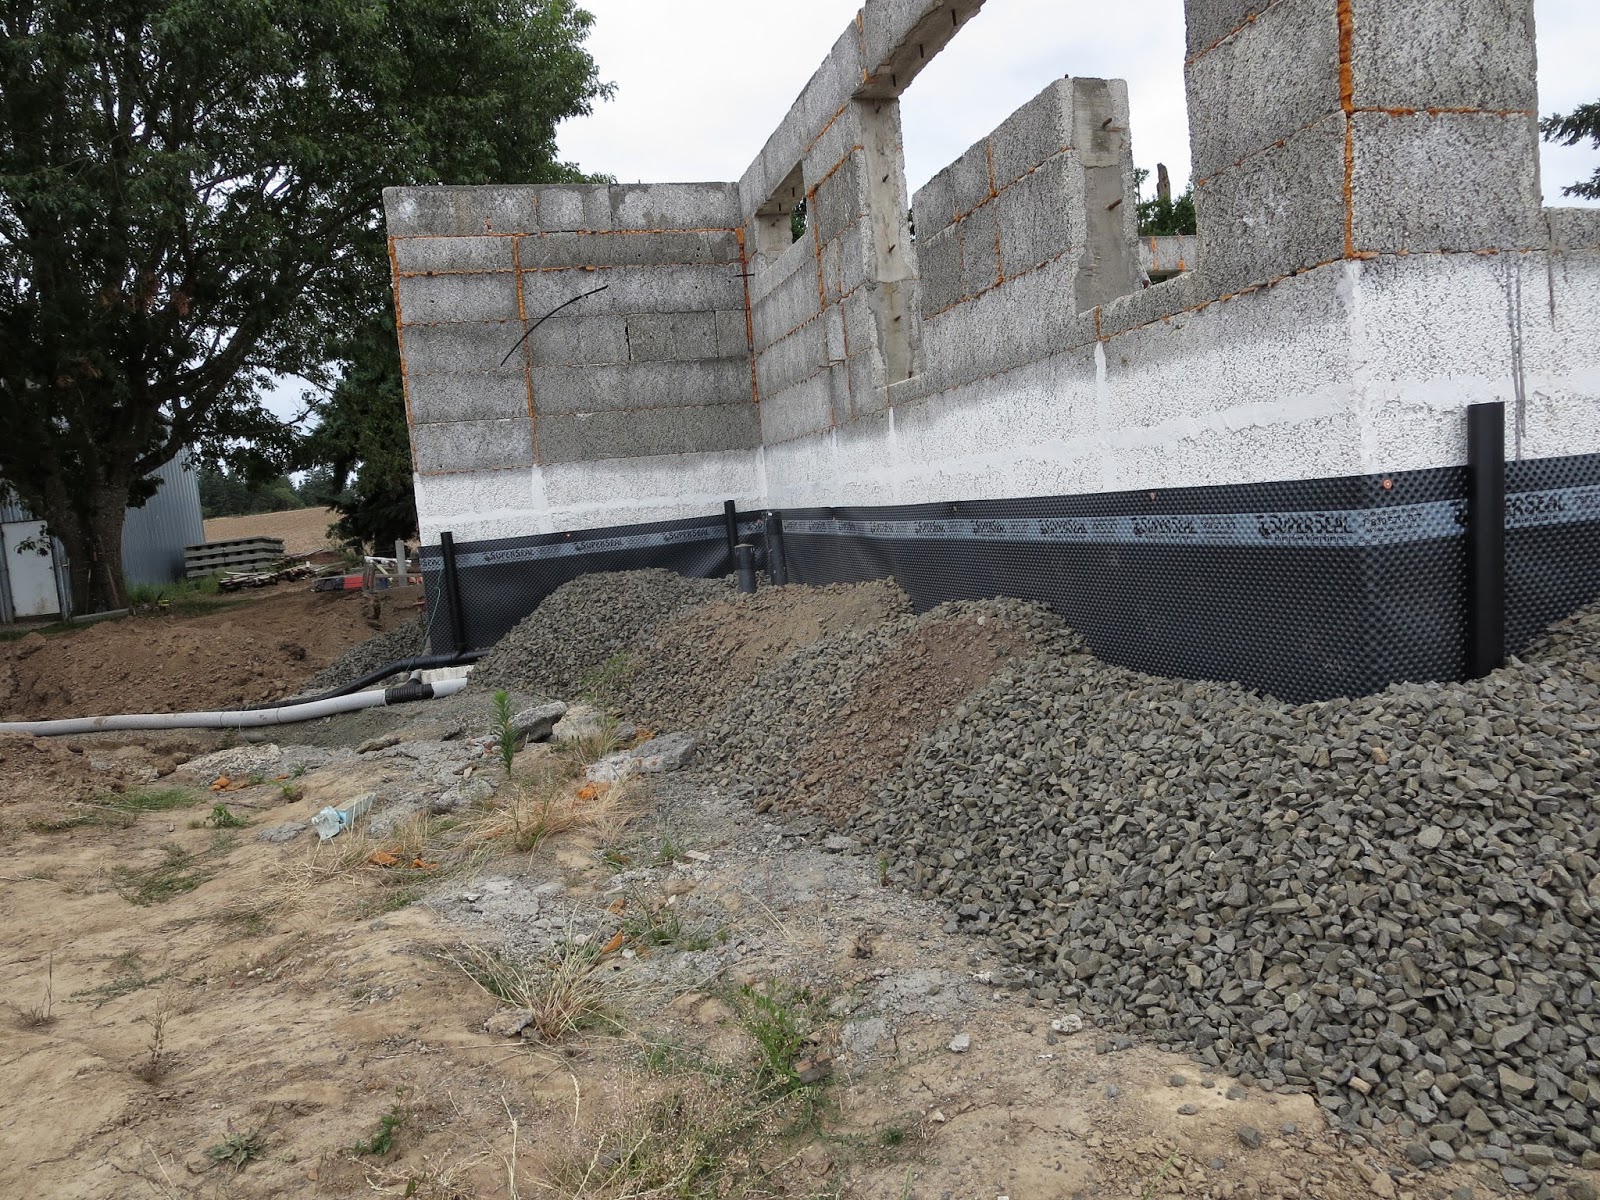
With the piping inspected we filled the trenches around the house. Then we continued to back fill around the house. The carport was filled with gravel that was compacted in lifts. The dirt line shows in the photos below.
The chimney is completed with cinder block. Waiting for the decorative rock to be installed. Doug, Ruth and Helen drove around town to look at rock on houses to pick the color for the chimney.
The floor trusses are going in. Before setting the trusses Doug built two pony walls the length the house. The trusses will sit on the walls. The trusses span the full width of the house. The bedroom trusses are shown in the photo below.
With the piping inspected we filled the trenches around the house. Then we continued to back fill around the house. The carport was filled with gravel that was compacted in lifts. The dirt line shows in the photos below.
The chimney is completed with cinder block. Waiting for the decorative rock to be installed. Doug, Ruth and Helen drove around town to look at rock on houses to pick the color for the chimney.
The floor trusses are going in. Before setting the trusses Doug built two pony walls the length the house. The trusses will sit on the walls. The trusses span the full width of the house. The bedroom trusses are shown in the photo below.
Monday, July 28, 2014
Walls are done on ward with the Chimney
July 28, 2014 Monday
Since the last posting Doug and Family have been very busy around the house and with life.
After the last concrete pour in the walls the forms were removed. The forms were then dismantled and stacked to be used later if needed.
Our crawl space is conditioned and will be used as the return for the air handling system. The footings need to be insulated and protected for fire. This was completed by covering the footing edge with rigid insulation. Then covering the entire footing with concrete. Doug lifted the concrete mixer into the center of the house and completed this task. Pictures are below. This required more form work.
Next we added dimple fabric to the outside wall as an additional protection against water infiltration. This required all hands on deck to get the material rolled out and nailed to the wall. Pictures are below.
Then the Rain Drains and Grey Water lines:
While we were digging trenches and putting in piping we installed the Electrical, Clean water and Cable for the satellite tv. Lots of holes in the ground. We also reconnected the main line for the farm irrigation back to the Pump. Pictures below:
With the piping and water supply installed and inspected the next step is to move on to back fill and chimney. The Chimney will be 32' tall and roof attaches to it. Bill is building the Chimney
Back filling
Since the last posting Doug and Family have been very busy around the house and with life.
After the last concrete pour in the walls the forms were removed. The forms were then dismantled and stacked to be used later if needed.
Our crawl space is conditioned and will be used as the return for the air handling system. The footings need to be insulated and protected for fire. This was completed by covering the footing edge with rigid insulation. Then covering the entire footing with concrete. Doug lifted the concrete mixer into the center of the house and completed this task. Pictures are below. This required more form work.
Next we added dimple fabric to the outside wall as an additional protection against water infiltration. This required all hands on deck to get the material rolled out and nailed to the wall. Pictures are below.
Then the Rain Drains and Grey Water lines:
While we were digging trenches and putting in piping we installed the Electrical, Clean water and Cable for the satellite tv. Lots of holes in the ground. We also reconnected the main line for the farm irrigation back to the Pump. Pictures below:
With the piping and water supply installed and inspected the next step is to move on to back fill and chimney. The Chimney will be 32' tall and roof attaches to it. Bill is building the Chimney
Back filling
Friday, May 9, 2014
final pour of concrete in walls
april 30, we did our final pour . we had alot of help from friends and that saved the day. dick and ann meeuwsen, and their son ben. marvin vandyke, brent hunter, and the flemmers concrete crew. only had one bad blow out that we fixed and got on with. roughly 12 to 13 yards of concrete plus mikes concrete pumping truck. on this last pour we were spanning the window openings so we had to hold up the wet concrete with wood beams and plywood we cut the center of the rastra block out and built wood forms around the top of the wall to hold the rastra during the pour . there also is four 5/8 rebar continuous around this header beam. this last portion took several months to prep for with all the forms to build and install. we had to stage anchor bolts in the window and door openings so they would be embedded in the concrete. also had to make sure anchor bolts got install in the top round of this header beam to hold down the trusses. The walls without the floor inside the house are roughly 13 foot tall so we had a crew of four pushing scaffolding around during the pour. we also had several people up ladders and some of the concrete folks were walking the wall . It is the most exhausting two hours from start to finish , glad i don't do it for a living. Masonary fireplace will be our next big project with the suspended floor going in before the trusswork will be installed.
Sunday, March 9, 2014
March 9, 2014
We are working toward the last pour. All the whole blocks of Rastra have been placed. The final round at the top will be a concrete beam that runs around the entire house. Bridging over the window and door openings. The beam will have 4 pieces of 5/8" rebar in it. Looking at a cross- section of the beam -there would be 3" of Rastra, 6" of concrete, and another 3" of Rastra. To get this structure the cells are cut out of the Rastra block and a panel remain. The rastra panels are held in place by the wood forms that are banded to the wall. In order to keep the panels from falling in during the final pour all-thread is run across the panels. nuts with washers keep the proper spacing between the panels and will be left in the wall after the pour. in the pictures you will see anchor bolts for the windows in the form, this end the bolt will be embedded in the concrete after the final pour.
Subscribe to:
Posts (Atom)