July 28, 2014 Monday
Since the last posting Doug and Family have been very busy around the house and with life.
After the last concrete pour in the walls the forms were removed. The forms were then dismantled and stacked to be used later if needed.
Our crawl space is conditioned and will be used as the return for the air handling system. The footings need to be insulated and protected for fire. This was completed by covering the footing edge with rigid insulation. Then covering the entire footing with concrete. Doug lifted the concrete mixer into the center of the house and completed this task. Pictures are below. This required more form work.
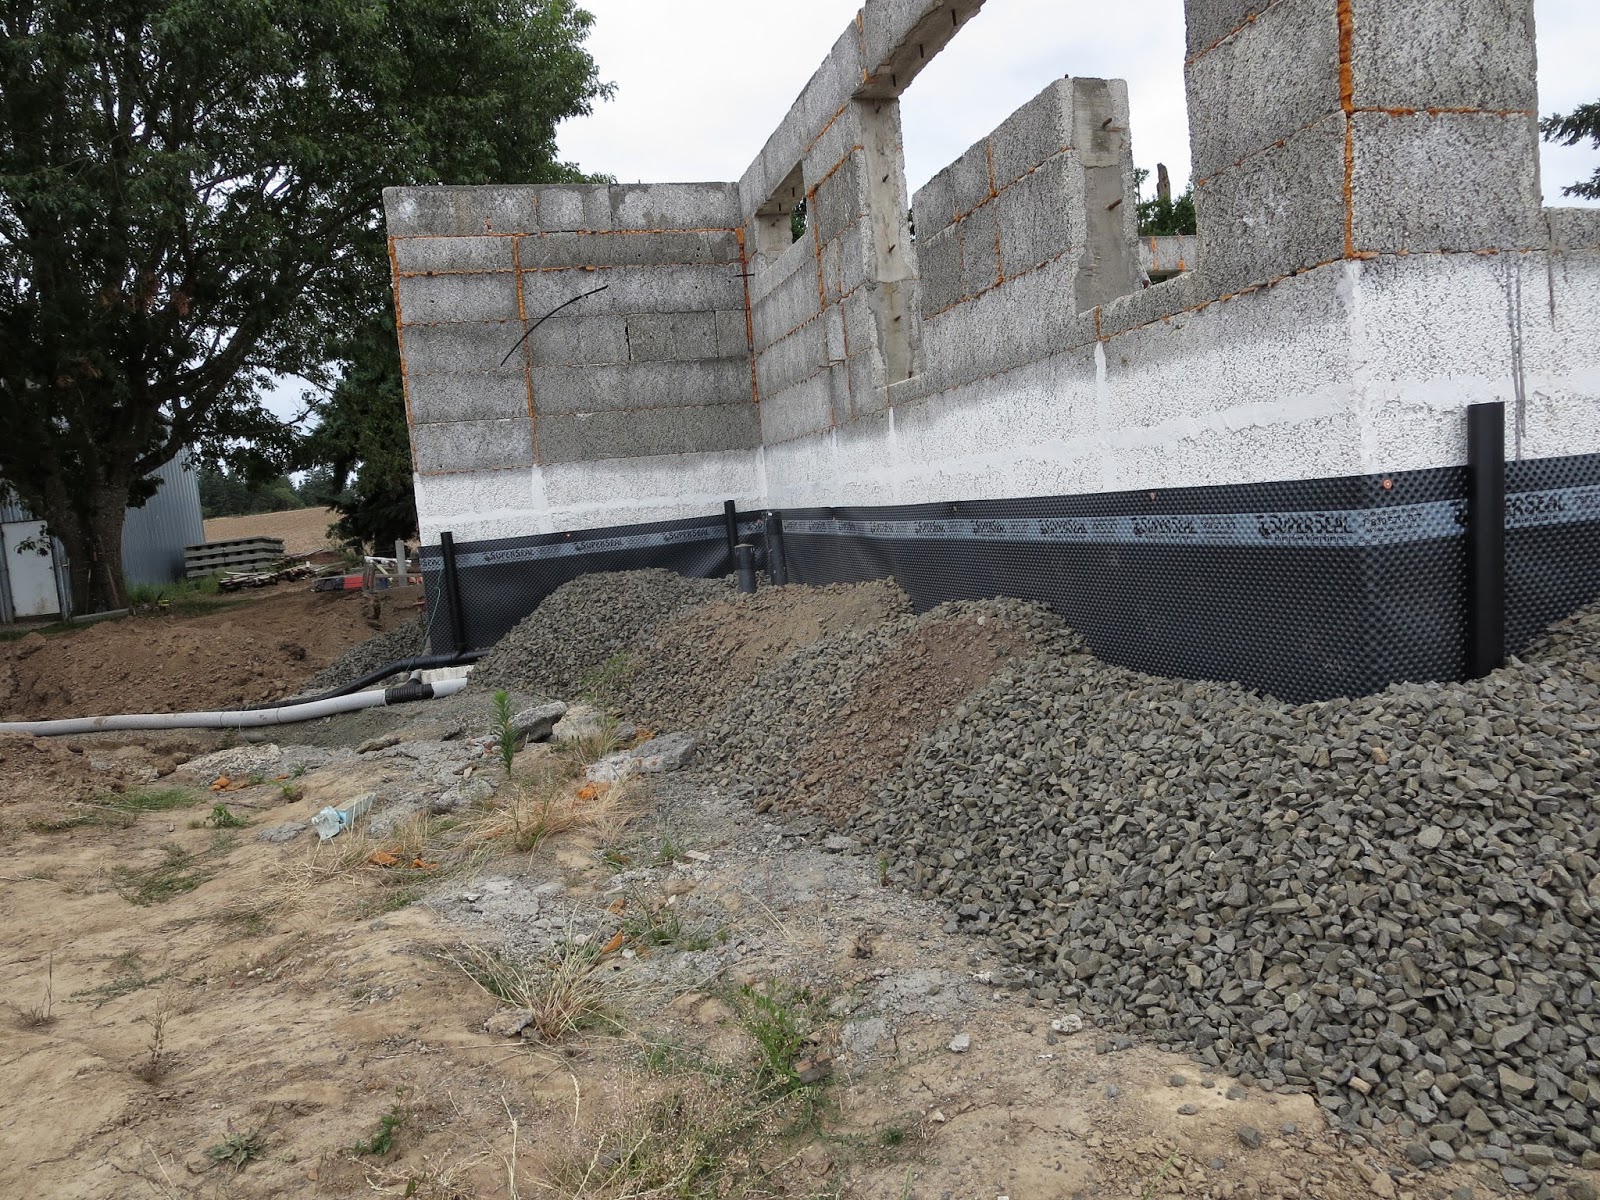
Next we added dimple fabric to the outside wall as an additional protection against water infiltration. This required all hands on deck to get the material rolled out and nailed to the wall. Pictures are below.
Then the Rain Drains and Grey Water lines:
While we were digging trenches and putting in piping we installed the Electrical, Clean water and Cable for the satellite tv. Lots of holes in the ground. We also reconnected the main line for the farm irrigation back to the Pump. Pictures below:
With the piping and water supply installed and inspected the next step is to move on to back fill and chimney. The Chimney will be 32' tall and roof attaches to it. Bill is building the Chimney
Back filling
Monday, July 28, 2014
Friday, May 9, 2014
final pour of concrete in walls
april 30, we did our final pour . we had alot of help from friends and that saved the day. dick and ann meeuwsen, and their son ben. marvin vandyke, brent hunter, and the flemmers concrete crew. only had one bad blow out that we fixed and got on with. roughly 12 to 13 yards of concrete plus mikes concrete pumping truck. on this last pour we were spanning the window openings so we had to hold up the wet concrete with wood beams and plywood we cut the center of the rastra block out and built wood forms around the top of the wall to hold the rastra during the pour . there also is four 5/8 rebar continuous around this header beam. this last portion took several months to prep for with all the forms to build and install. we had to stage anchor bolts in the window and door openings so they would be embedded in the concrete. also had to make sure anchor bolts got install in the top round of this header beam to hold down the trusses. The walls without the floor inside the house are roughly 13 foot tall so we had a crew of four pushing scaffolding around during the pour. we also had several people up ladders and some of the concrete folks were walking the wall . It is the most exhausting two hours from start to finish , glad i don't do it for a living. Masonary fireplace will be our next big project with the suspended floor going in before the trusswork will be installed.
Sunday, March 9, 2014
March 9, 2014
We are working toward the last pour. All the whole blocks of Rastra have been placed. The final round at the top will be a concrete beam that runs around the entire house. Bridging over the window and door openings. The beam will have 4 pieces of 5/8" rebar in it. Looking at a cross- section of the beam -there would be 3" of Rastra, 6" of concrete, and another 3" of Rastra. To get this structure the cells are cut out of the Rastra block and a panel remain. The rastra panels are held in place by the wood forms that are banded to the wall. In order to keep the panels from falling in during the final pour all-thread is run across the panels. nuts with washers keep the proper spacing between the panels and will be left in the wall after the pour. in the pictures you will see anchor bolts for the windows in the form, this end the bolt will be embedded in the concrete after the final pour.
Monday, December 23, 2013
Ground Source Heat Pump-Lines/ Rat Slab
This is an earlier photo (July 2013) with Ruth and Helen (our daughter) showing off the
ground source heat pump piping coming into the house. We are having a
conditioned crawl space. So, in the background you see the floor of the
crawl space with the rat slab on top of three inches of foam on top of
radon gas barrier. Then under that sand and rock with three inch pipe to
vent the radon gas. The crawl space will be the return plenum for the
furnace so no outside venting is required. It is well insulated so the crawl
space will be the same temp as the house and temper the air in the house This eliminated the use of
underfloor insulation and the rat slab will keep critters from digging
into the house. thank you for the kind words..
Saturday, December 14, 2013
Second Concrete Pour in Walls
December 13, 2013
with the stretch of cold freezing weather behind us it is time to pour the second three coarses of block . So on friday at one thirty in the afternoon the crew start showing up. we needed the roll around scaffolding moved along the wall while poring , so Ruth , Ann and Paul take on the challenge of moving the scaffolding doing the Hop scotch method. The crew from flemmer concrete Rob, Floyd and Jay were up ontop of the scaffolding getting ready to pour from the pump truck hose then use the vibrator to make sure the concrete settles in good. Marty followed the pour with a brush to clean off the top of the block to make the instulation of the next pour go easier. I did what ever needed doing from vibrating to nailing the plugs back in under the windows. we ordered 8.5 yards of concrete and it worked out just fine. by two thirty we had the concrete in the walls then another hour of cleaning up slopped concrete on equipment and the crawl space floor. No blow outs in the forms which is great and tommorrow its time to strip the forms off. During the pour everyone worked together for the common goal and did great.
Saturday, December 7, 2013
Getting Ready for Second Concrete Pour
December 7, 2013
We are getting close to the second pour of concrete in the walls. Our first pour was back in October. Since that time we have put 3 more rounds or Rastra block around the house. The cut outs for the windows are starting to show up.
We spent a bit of time to calculate where the bottoms of all the windows would be. The tops of the window are all at the same height. Above them there is minimum depth needed for the concrete lentil beam that runs around the house. At the bottom there is a minimum height off the floor to the start of the glass for non tempered glass. Then there is the aesthetic When you are sitting in the chair where do you want the glass to start. There is big difference between 22' and 25 inches off the floor, as far as what can be seen when sitting.
Every round has re bar in it. The windows and doors have an additional vertical re-bar going up that is continuous with the horizontal re-bar. This is requiring 3 dimensional bends in the re-bar. That is fun to bend!
In every window and door opening we placed bucks as a form for the concrete to but up against during the pour and while it cures. This task took some precision. The bucks needed to be level and plumb and the correct distance apart. So build a channel and measure, measure, measure. This extras step to make everything square and true should make putting the windows easier.
We applied water proofing to the portion of the was below ground. The water proofing was very thick. The Rastra is very coarse. The first attempt was painting and rolling the water proofing on the wall. This was very time consuming. The next attempt was to use a texturing gun. The same tool that used for texturing walls. This worked very well and we were able to apply 2 coats of water proofing in a couple of days.
For additional protection from water we will be applying a dimple board that will keep the dirt from touching the wall. If any water does get behind the dimple board it will have a path to move down to the footing.
We had our inspection on Friday for our second pour. That went well. Now the temperature just needs to change a bit and we can schedule our pour. The temperatures are in the teens and twenties. That is pretty cold for Portland and too cold for a concrete pour.
PICTURES
We are getting close to the second pour of concrete in the walls. Our first pour was back in October. Since that time we have put 3 more rounds or Rastra block around the house. The cut outs for the windows are starting to show up.
We spent a bit of time to calculate where the bottoms of all the windows would be. The tops of the window are all at the same height. Above them there is minimum depth needed for the concrete lentil beam that runs around the house. At the bottom there is a minimum height off the floor to the start of the glass for non tempered glass. Then there is the aesthetic When you are sitting in the chair where do you want the glass to start. There is big difference between 22' and 25 inches off the floor, as far as what can be seen when sitting.
Every round has re bar in it. The windows and doors have an additional vertical re-bar going up that is continuous with the horizontal re-bar. This is requiring 3 dimensional bends in the re-bar. That is fun to bend!
In every window and door opening we placed bucks as a form for the concrete to but up against during the pour and while it cures. This task took some precision. The bucks needed to be level and plumb and the correct distance apart. So build a channel and measure, measure, measure. This extras step to make everything square and true should make putting the windows easier.
We applied water proofing to the portion of the was below ground. The water proofing was very thick. The Rastra is very coarse. The first attempt was painting and rolling the water proofing on the wall. This was very time consuming. The next attempt was to use a texturing gun. The same tool that used for texturing walls. This worked very well and we were able to apply 2 coats of water proofing in a couple of days.
For additional protection from water we will be applying a dimple board that will keep the dirt from touching the wall. If any water does get behind the dimple board it will have a path to move down to the footing.
We had our inspection on Friday for our second pour. That went well. Now the temperature just needs to change a bit and we can schedule our pour. The temperatures are in the teens and twenties. That is pretty cold for Portland and too cold for a concrete pour.
PICTURES
Subscribe to:
Posts (Atom)